MiniMax H4 AI Object Remover for distractions you can describe
Keep the photograph and address the object distracting from it. The MiniMax H4 AI Object Remover uses GPT Image 2 reference editing: upload an image and describe what should disappear. Give the MiniMax H4 AI Object Remover a specific target and surrounding surface, then compare the result with your original.
Image workspace
Sample Image
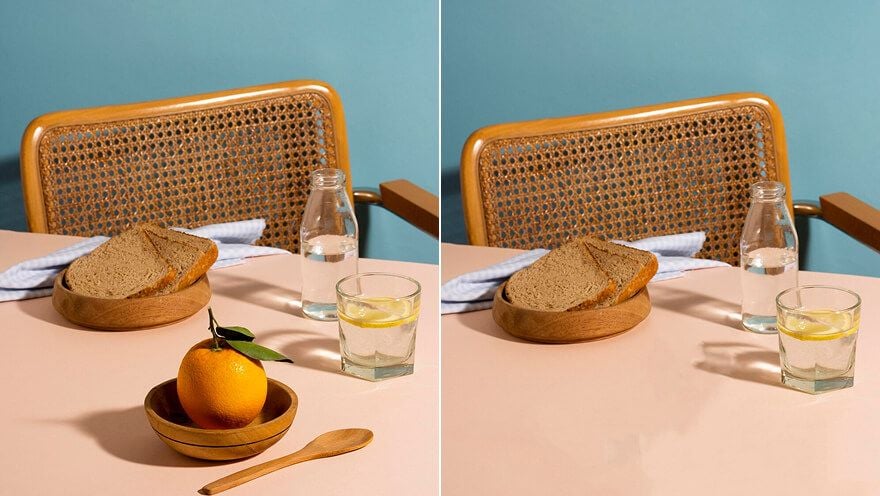 17 / 17
Introduction
Give the MiniMax H4 AI Object Remover one clear target
Give the MiniMax H4 AI Object Remover a defined target and purpose, starting with the distraction that most weakens the photograph.
Choose what the image should emphasize
A loose object beside the main subject can pull attention away from an otherwise useful composition. Tell the MiniMax H4 AI Object Remover which element matters and which one should go. Keep the request tied to the photograph’s purpose instead of removing every sign of everyday context.
Edit through words rather than brushes
Upload the photograph and identify the unwanted object in writing. The MiniMax H4 AI Object Remover uses GPT Image 2 image mode, not a brush or mask selection interface. Describe the target with its position and visible characteristics so the instruction is understandable without a painted region.
Keep the original composition available
The MiniMax H4 AI Object Remover starts at 1K with Auto framing, and you can select 2K or 4K. Keep the source image for comparison. A higher resolution does not establish that hidden background information was recovered accurately; the edited area is a generated interpretation.
How to use
How to use the MiniMax H4 AI Object Remover
- Input
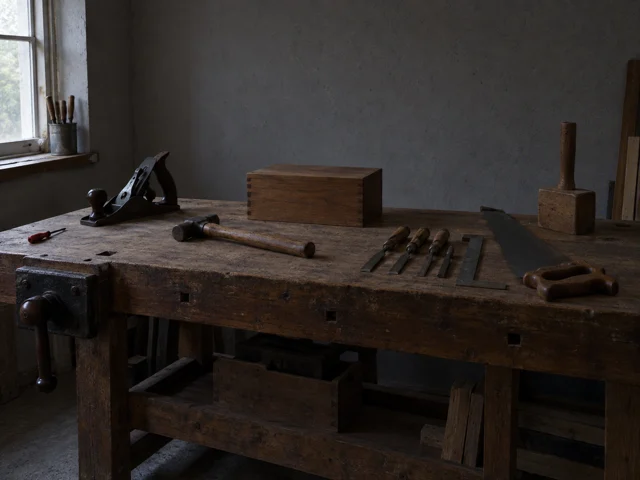 Reference image 1STEP 1
Upload the source photograph
Choose GPT Image 2 image mode in the MiniMax H4 AI Object Remover and upload the photograph containing the distraction you want removed.
- Example settingsGPT Image 21KPromptOutputSTEP 2
Describe the unwanted object
Tell the MiniMax H4 AI Object Remover which object to remove, where it appears, and which nearby subject details should remain recognizable.
 BeforeAfterSTEP 3
Generate the edited image
Start the MiniMax H4 AI Object Remover at 1K with Auto framing, check the displayed credits, and submit your written cleanup instructions.
- STEP 4
Compare the repaired area
Inspect MiniMax H4 AI Object Remover texture, edges, shadows, and the main subject against your original before refining or downloading the edited photograph.
Features
Locate MiniMax H4 AI Object Remover targets with precise language
Help the MiniMax H4 AI Object Remover distinguish the target from similar objects, using visible location cues and nearby details to retain.
Use location and a visible characteristic
Identify the small dark object near the tabletop’s left edge rather than just the object. Give the MiniMax H4 AI Object Remover useful cues: position, color, and relationship to the main subject. A concise description is easier to check than a long list of adjectives.
- Use the image’s visible left and right consistently.
- Name nearby elements the MiniMax H4 AI Object Remover should leave in place.
Distinguish matching or repeated objects
When the photograph contains several cups or chairs, specify which one is unwanted. The MiniMax H4 AI Object Remover should not have to guess whether you mean the closest, largest, or partially hidden example. State the target’s relationship to a fixed feature such as a window or desk.
Separate the target from its surroundings
A cable crossing a tabletop may sit beside a deliberate seam or decorative line. Tell the MiniMax H4 AI Object Remover which line to remove and which belongs to the surface. This distinction gives you a concrete detail to inspect rather than accepting a generally smoother patch.

Tell the MiniMax H4 AI Object Remover what belongs behind the target
Guide the MiniMax H4 AI Object Remover with surrounding texture and geometry, recognizing that the source may not show the hidden area.
Continue the existing material
Ask for the neighboring wall paint, wood grain, or floor texture to continue naturally. Give the MiniMax H4 AI Object Remover a restrained reconstruction brief. Introducing a new decorative surface can turn a small cleanup into an unintended redesign of the whole setting.
- Use nearby texture as the visual guide for the fill.
- Check MiniMax H4 AI Object Remover patches for sudden changes in grain or pattern.
Preserve perspective across straight edges
A target may conceal part of a shelf, tile joint, or table edge. Ask the MiniMax H4 AI Object Remover to continue those lines in the existing perspective. Check the joins, because an attractive texture can hide a bent edge that undermines the scene.
Be careful with large hidden regions
If the target covers most of an important feature, the image offers little evidence of what sits behind it. Keep MiniMax H4 AI Object Remover expectations modest in those cases. Use an authorized additional reference when available, or choose a different source that shows the needed detail more clearly.

Review MiniMax H4 AI Object Remover shadows and overlapping details
Include relevant shadows and reflections in the MiniMax H4 AI Object Remover brief while keeping the remaining subject’s edges clear.
Address the object’s visible shadow
A removed cup can leave an unexplained dark patch on the table if its shadow is treated separately. Tell the MiniMax H4 AI Object Remover to remove the target and its associated shadow while keeping shadows cast by the remaining objects consistent with the scene’s lighting.
- Compare shadow direction with the objects that remain.
- Keep MiniMax H4 AI Object Remover requests specific about which dark patch belongs to the target.
Consider reflections in nearby surfaces
An unwanted object may also appear in glass or a glossy surface. Identify that reflection in the MiniMax H4 AI Object Remover brief when it is visible. Inspect the result for duplicated fragments, ghost shapes, and highlights that no longer make sense after the object has disappeared.
Protect edges that cross the target
Hair, fabric, or a foreground branch may overlap the unwanted object. Explain which subject edge should remain recognizable. The MiniMax H4 AI Object Remover can alter neighboring details while filling the gap, so inspect those boundaries rather than judging only whether the main distraction is gone.

Use the MiniMax H4 AI Object Remover for a focused cleanup sequence
Give each MiniMax H4 AI Object Remover request a defined target and success condition instead of treating a complex scene as one cleanup.
Start with the most distracting element
Choose the object that most interferes with the subject and describe its removal first. An MiniMax H4 AI Object Remover request covering several unrelated targets makes mistakes harder to diagnose. Once you have reviewed the result, decide whether another cleanup actually improves the composition.
Keep necessary context in the frame
A worktable can still look like a worktable with a few appropriate tools left nearby. Use the MiniMax H4 AI Object Remover to improve hierarchy rather than erase every sign of use. Removing too much may weaken the story or make the remaining arrangement feel unnatural.
Distinguish cleanup from background removal
This workflow rebuilds image content around a named object; it does not automatically isolate the main subject on transparency. Use the MiniMax H4 AI Object Remover for localized scene cleanup. A dedicated background-removal task serves a different purpose when you need a transparent cutout instead.

Check MiniMax H4 AI Object Remover results at two viewing sizes
Inspect MiniMax H4 AI Object Remover texture and edges closely, then check whether the complete composition still directs attention where you intended.
Inspect the reconstructed patch
Look for repeated texture, inconsistent blur, and abrupt pattern changes. Compare the MiniMax H4 AI Object Remover patch with nearby material at a similar camera distance. A detailed fill can still be too sharp or too smooth for the surrounding photograph.
Compare the main subject with the source
Check faces, labels, important proportions, and colors outside the target area. The MiniMax H4 AI Object Remover does not guarantee unchanged neighboring pixels. Keep the version that best serves the intended photograph, not simply the one where the unwanted item is least noticeable.
Refine the instruction before downloading
If the edit removes the wrong object, clarify its location. If the fill is distracting, simplify the reconstruction brief. Review the displayed credits before another MiniMax H4 AI Object Remover request, then download an approved result and retain the original for any later comparison.

Example prompts
Remove a tabletop distraction
Use the uploaded photograph as the source. Remove only the small distracting object nearest the left edge of the surface and its associated contact shadow. Keep the main subject, remaining objects, framing, and lighting as recognizable as possible. Continue the surrounding surface texture and perspective naturally. Do not introduce new objects, text, or a different background.
Clean up behind the main subject
Edit the uploaded image by removing the unwanted background object directly behind and to the right of the main subject. Preserve the subject’s recognizable appearance and overlapping edges as closely as possible. Rebuild the gap using the neighboring background material, consistent light, and matching depth of field. Leave other objects in place; do not turn the image into a transparent cutout.
User reviews
MiniMax H4 creator workflow examples.
MiniMax H4 creator workflows

Create a short MiniMax H4 game scene using a character reference and a clear action. Compare the generated character, interface details, and motion with the source before using the result.

Explore an animation look in MiniMax H4 with a focused visual brief. Keep a style reference, test one motion at a time, and inspect consistency between shots.

Use product photographs to plan a MiniMax H4 listing video. Review the actual packaging, visible labels, and generated audio; assess campaign results using your own measurements.

Prepare a short MiniMax H4 vertical video with one subject and one visible change. Choose the ratio, preview the complete clip, and revise the prompt before publishing.

Choose an available editing model in MiniMax H4 and describe the intended change. Check preserved details, lighting, and frame continuity against the original recording.

Build a MiniMax H4 shot study before a shoot. Describe framing and camera movement, review each draft, and keep the result as a planning aid rather than a guarantee of the final shot.
MiniMax H4 Pricing and Credit Plans
Cancel anytime
Lite
50% off0.025 / credit
Billed $ yearly179· Save $179.8
Video Models



Image Models



- Includes MiniMax H4 and all premium models
- Up to 1 batch generation task
- Standard generation speed
- Standard generation success rate
- Standard customer support
- Commercial Use License
Standard
50% off0.017 / credit
Billed $ yearly299· Save $299.8
Video Models
Image Models
- Includes MiniMax H4 and all premium models
- Up to 4 batch generation tasks
- Priority processing speed
- High generation success rate
- Priority customer support
- Commercial Use License
Pro
50% off0.014 / credit
Billed $ yearly599· Save $599.8
Video Models
Image Models
- Includes MiniMax H4 and all premium models
- Up to 10 batch generation tasks
- Fastest generation speed
- High generation success rate
- Dedicated account manager
- Commercial Use License
Max
50% off0.012 / credit
Billed $ yearly1,199· Save $1,199.8
Video Models
Image Models
- Includes MiniMax H4 and all premium models
- Up to 10 batch generation tasks
- Fastest generation speed
- High generation success rate
- Dedicated account manager
- Commercial Use License
Pay safely and securely with
























FAQ
Frequently asked questions
Do I need to paint a mask in the MiniMax H4 AI Object Remover?
No. Upload your image and write the instruction; this workspace has no brush selection. Identify the target by position, color, and nearby objects, explaining which surrounding details should remain.
Can the MiniMax H4 AI Object Remover remove more than one object?
You can describe several targets, but start with a focused request in complex scenes. Distinguish unwanted objects from similar items you want to retain, then review the result before deciding on another cleanup.
Will it recover the exact background behind an object?
No. The MiniMax H4 AI Object Remover generates a plausible continuation from the supplied image and instructions. Hidden details are not verified facts. Use the result for an appropriate creative purpose, not as evidence of what the obstructed area originally contained.
Is this the same as producing a transparent background?
No. The MiniMax H4 AI Object Remover edits a described object within the scene and reconstructs the surrounding image. Removing the entire backdrop to create a transparent subject cutout is a different task with a dedicated background-removal workflow.
Can I select a higher output resolution?
Yes. The MiniMax H4 AI Object Remover begins at 1K and also offers 2K or 4K through GPT Image 2. Review the displayed credits for your actual configuration. Choosing more output detail does not guarantee precise preservation or restoration of missing information.
CTA
Give the MiniMax H4 AI Object Remover a specific distraction
Upload the photograph, identify the distraction, and describe the surrounding space. Check settings and displayed credits, then compare the edit with your original.
Describe what to remove