MiniMax H4 Text to image with a scene you can clearly describe
Build an image around a moment, not a pile of adjectives. MiniMax H4 text to image starts with your written scene and GPT Image 2 in text mode at 1:1 and 1K. Describe the subject, object relationships, and light. Use MiniMax H4 text to image to explore the idea, then refine what matters most.
Image workspace
Sample Image
 22 / 30
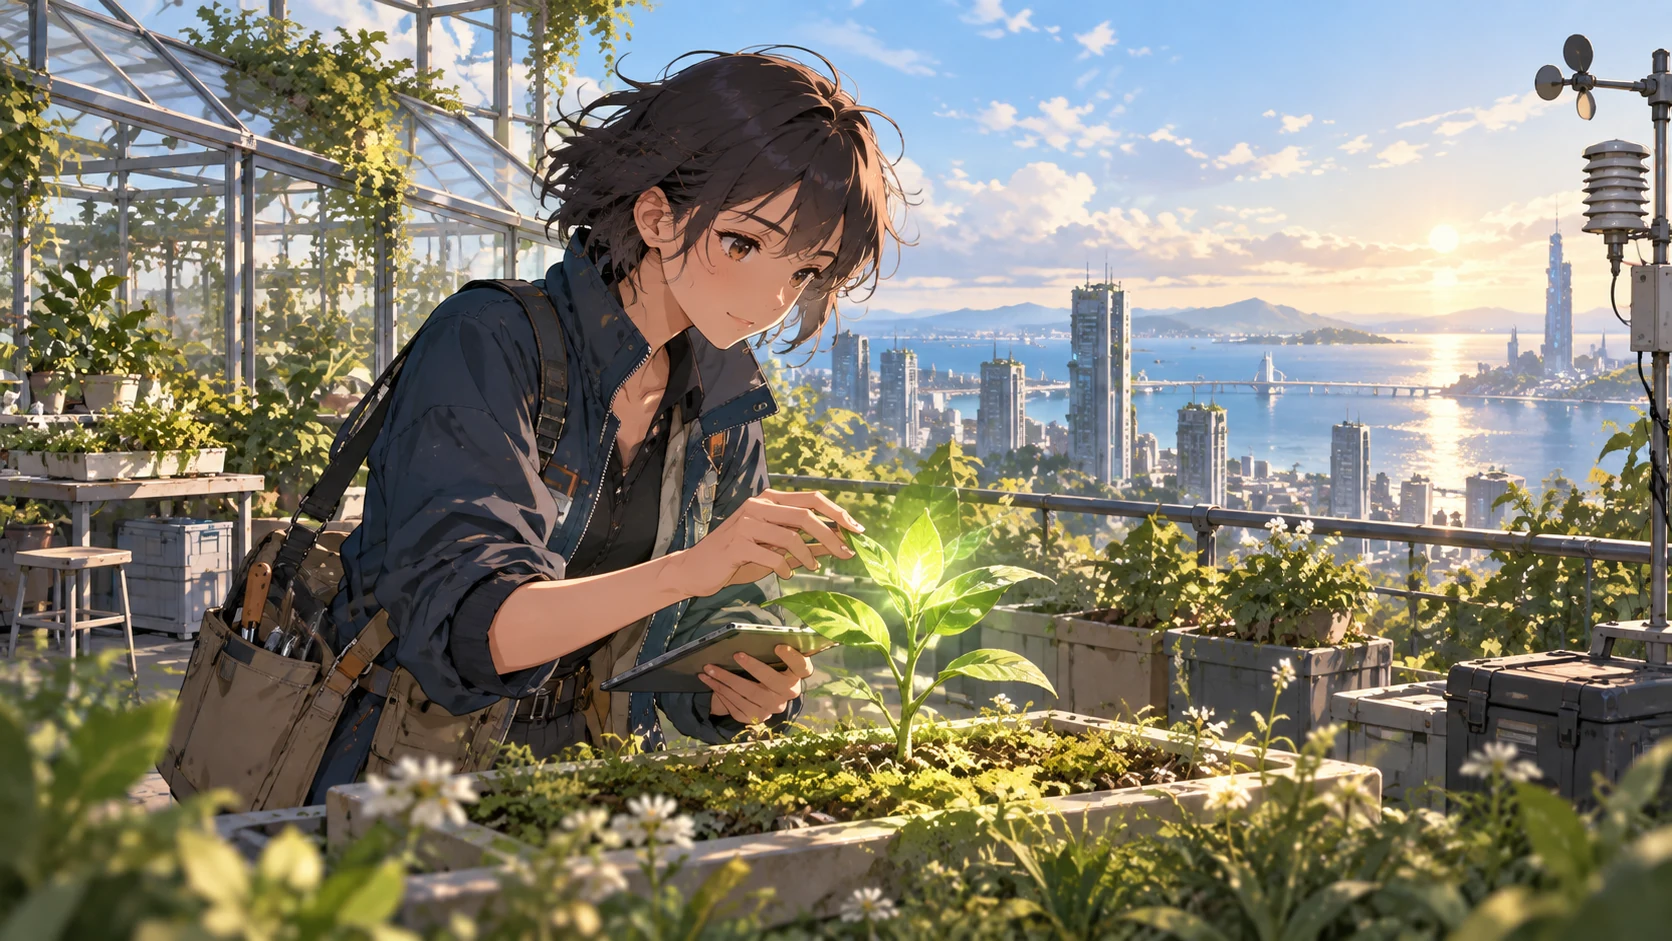
AI-generated illustration of a fictional rooftop botanist and coastal city.
Introduction
Give MiniMax H4 text to image one clear assignment
Start by deciding what the picture should communicate. A focused MiniMax H4 text to image brief makes the subject, action, and purpose understandable before you introduce the finer details of style.
Describe a moment rather than a category
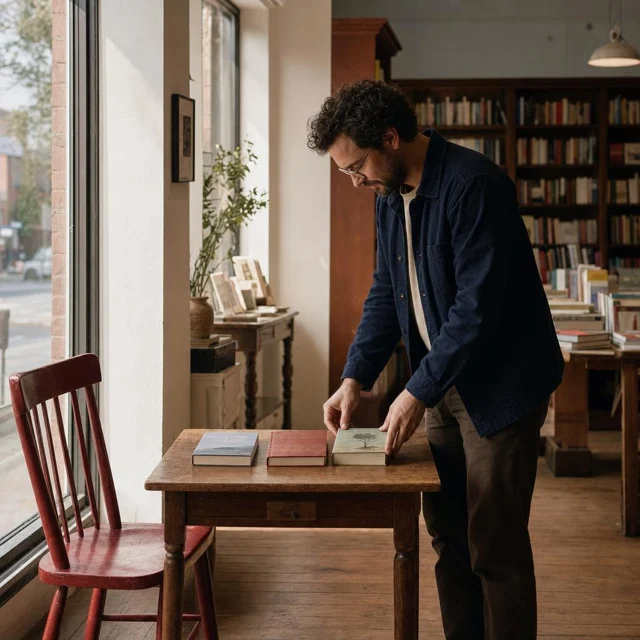
A bookshop is a category; an owner arranging the last books before opening is a scene. Give MiniMax H4 text to image a visible action and a subject that performs it. This establishes where attention belongs and suggests which supporting objects are actually useful.
- Name the main subject, its action, and the place in one sentence.
- Keep your MiniMax H4 text to image brief centered on that moment.
Choose the intended viewing context
A square social illustration needs a different composition from a wide presentation cover. Explain the destination when planning MiniMax H4 text to image, but also describe its visual consequences: a large readable subject, space for a headline, or room to see the surrounding environment.
Separate essentials from optional detail
List the two or three features without which the image would miss your idea. Treat everything else as supporting detail. In MiniMax H4 text to image, a yellow raincoat and an empty station may matter more than the exact number of windows in distant buildings.
How to use
How to create with MiniMax H4 text to image
- PromptSTEP 1
Describe one moment
Select GPT Image 2 text mode for MiniMax H4 text to image, then name your main subject, action, and setting in one sentence.
- ModelGPT Image 21K1:1PromptSTEP 2
Place the objects
Direct MiniMax H4 text to image with specific object counts, positions, and lighting, making foreground, subject, and background relationships easy to understand.
- Detail
 STEP 3
Generate a draft
Start MiniMax H4 text to image at square 1K, choose your output count, review the displayed credits, and generate the first scene.
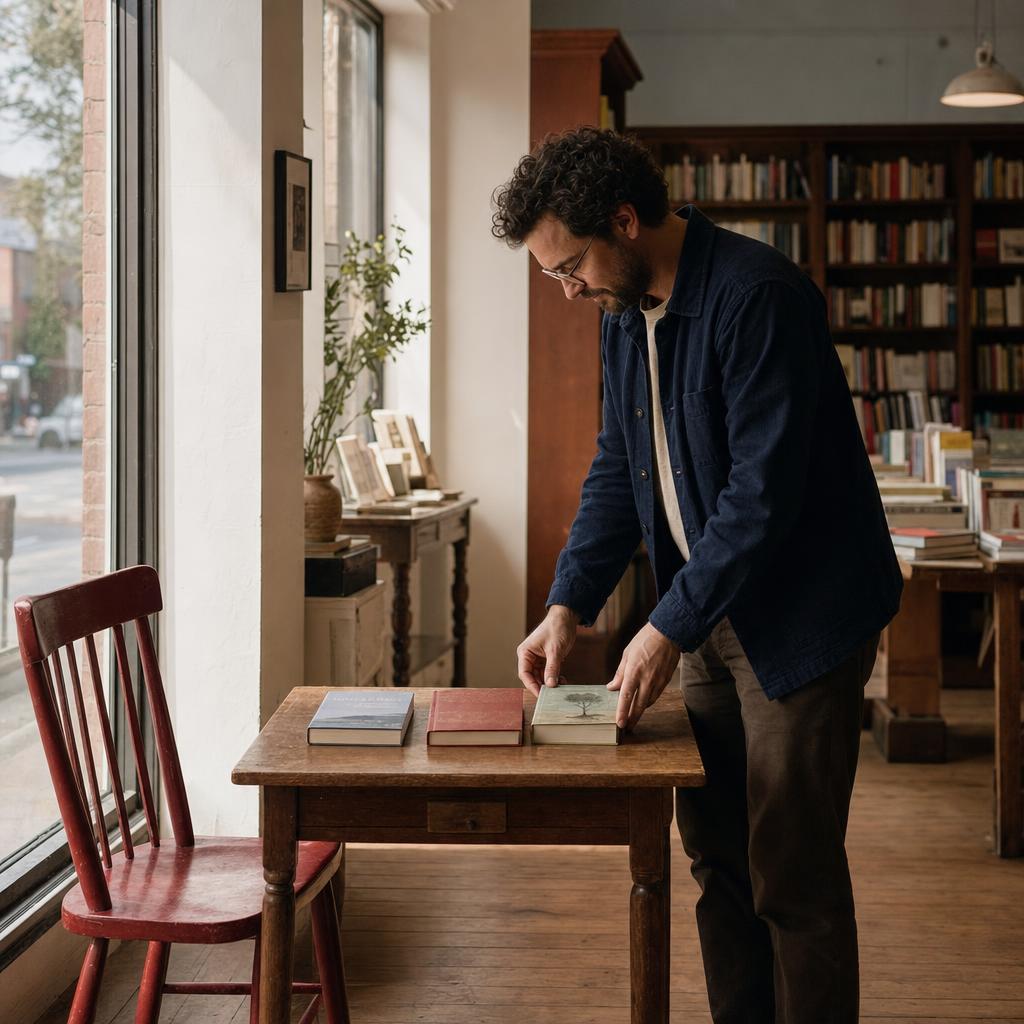
- Create a realistic square editorial photograph of an adult bookshop owner arranging exactly three books on a small wooden table near the front window. One red chair stands to the left of the table. The owner is on the right, looking down at the books. Soft morning light enters from the left, with gentle shadows extending right. Keep the distant shelves quiet and slightly softer than the subject. Show believable hand contact, readable object separation, and no signs, captions, or logos.DownloadSTEP 4
Revise one instruction
Compare MiniMax H4 text to image results with your brief, checking composition and object relationships before changing one instruction and trying again.
Features
Make object relationships explicit in MiniMax H4 text to image
Objects need positions and relationships, not just names. Tell MiniMax H4 text to image what is beside, behind, above, or inside something else so you have a concrete arrangement to inspect.
Assign counts to important objects
Write one red chair beside a small wooden table, with two books stacked on the table. Specific counts make a MiniMax H4 text to image request easier to review. If extra chairs or merged books appear, you can identify the mismatch without reconsidering the whole composition.
- Keep the first arrangement small enough to inspect object by object.
- Use MiniMax H4 text to image revisions to fix the relationship that failed.
Avoid ambiguous pronouns
Replace put it behind that with place the lamp behind the chair on the left. Repeating the object name is useful when several things share a scene. Clear nouns help MiniMax H4 text to image communicate spatial instructions without making the reader guess which object you mean.
Describe interactions that make physical sense
A person holding a cup needs a believable hand position; a bicycle leaning against a wall needs contact. Include those interactions in MiniMax H4 text to image instructions. Afterwards, inspect whether the objects genuinely connect or only appear near each other in the frame.
Plan a readable MiniMax H4 text to image composition
Imagine the image as a few large shapes before filling it with detail. Give MiniMax H4 text to image a camera distance, a clear focal point, and a quieter area around it.
State the camera distance
Choose a close view of hands at a workbench, a waist-up portrait, or a wide room scene. These are different assignments for MiniMax H4 text to image. Requesting both intimate facial detail and an expansive landscape can leave neither part large enough to read.
- A closer view favors expression, material, and small actions.
- A wider MiniMax H4 text to image scene needs a stronger silhouette and simpler pose.
Build foreground, subject, and distance
For a harbor scene, try a dark railing in front, a figure beside it, and pale boats farther away. This gives MiniMax H4 text to image a depth plan. Keep the distant area less contrasty so it supports the subject instead of competing with it.
Reserve space for later layout
When a designer will add a title, request an uncluttered area on a named side. MiniMax H4 Text to image can explore the scene without embedding the final words. Check that the supposedly empty area is not filled with branches, reflections, or high-contrast background details.
Unify light and materials in MiniMax H4 text to image
Light, surface, and drawing treatment should support the same idea. Give MiniMax H4 text to image one coherent direction instead of combining every visual effect you like into a single request.
Name a source and its visible effect
Try morning light entering from a window on the right, with soft shadows falling left across a wooden desk. That MiniMax H4 text to image instruction describes something observable. Words such as beautiful or cinematic alone do not tell you where highlights and shadows should appear.
- Choose soft overcast light or strong directional light before adding accents.
- Keep the MiniMax H4 text to image lighting direction consistent across the scene.
Distinguish the important surfaces
A ceramic bowl, a brushed metal spoon, and a linen cloth should not share the same shine. Name the materials when writing MiniMax H4 text to image prompts. After generation, look for differences in reflection, texture, and edge softness rather than accepting uniformly glossy surfaces.
Choose a visual treatment that fits
Describe clean editorial illustration, a softly painted environment, or realistic studio photography, then add a few relevant traits. A MiniMax H4 text to image brief becomes less coherent when it simultaneously demands flat vector-like shapes, painterly brushwork, and photographic texture in every part.
Iterate on MiniMax H4 text to image without losing the idea
Keep the concept stable while you test a specific change. A deliberate MiniMax H4 text to image workflow lets you compare compositions instead of collecting unrelated pictures that happen to share a subject.
Assemble the first brief
Combine the subject, action, object relationships, framing, and light in a short paragraph. Start MiniMax H4 text to image with GPT Image 2, a square ratio, 1K, and one output. Read the prompt once for contradictions before submitting, especially around object counts and camera distance.
Choose the configuration
MiniMax H4 provides multiple ratios, 1K, 2K, or 4K, and one to four outputs with GPT Image 2. Choose a MiniMax H4 text to image configuration that suits the current question. Check the displayed credits for those actual settings before submitting rather than assuming a fixed price.
Revise one instruction
If the subject is too small, change the framing instruction before rewriting the costume, weather, and palette. Keep notes beside your MiniMax H4 text to image brief. Comparing versions is more useful when you know what changed; separate requests can still vary in other details.

Review MiniMax H4 text to image against the original brief
Use the brief as a checklist, not simply a source of inspiration. A striking MiniMax H4 text to image result may still omit the main action or reverse an important relationship between objects.
Check the large decisions first
Check the subject, pose, object count, and major positions before inspecting texture. The best MiniMax H4 text to image candidate should answer the assignment at a glance. A beautifully rendered cup does not rescue a scene that should show an empty table.
Inspect small but meaningful errors
Check hands, contact points, repeated objects, stray lettering, and impossible reflections. MiniMax H4 Text to image can introduce plausible-looking details that do not survive closer inspection. Decide whether to simplify the scene, request a revision, or choose another candidate based on the actual problem.
Move to references when specifics matter
When you need your particular product, room, or person rather than an invented version, use a reference-based workflow. MiniMax H4 Text to image is the place to explore an idea from words. It is not evidence of how a real object looks on its hidden side.
Example prompts
A quiet bookshop before opening
Create a realistic square editorial photograph of an adult bookshop owner arranging exactly three books on a small wooden table near the front window. One red chair stands to the left of the table. The owner is on the right, looking down at the books. Soft morning light enters from the left, with gentle shadows extending right. Keep the distant shelves quiet and slightly softer than the subject. Show believable hand contact, readable object separation, and no signs, captions, or logos.
An observatory above the harbor
Create an original square illustration of an adult astronomer on an observatory balcony overlooking a quiet harbor at dawn. Place the figure on the left beside one compact telescope, facing the pale boats in the distance. Use a dark foreground railing, a clear midground silhouette, and softer cool shapes beyond. Warm light touches the coat and telescope from the right. Clean expressive linework and restrained painted texture. Leave a calm area of sky at the upper right for typography added separately. No text or brand marks.
User reviews
MiniMax H4 creator workflow examples.
MiniMax H4 creator workflows

Create a short MiniMax H4 game scene using a character reference and a clear action. Compare the generated character, interface details, and motion with the source before using the result.

Explore an animation look in MiniMax H4 with a focused visual brief. Keep a style reference, test one motion at a time, and inspect consistency between shots.

Use product photographs to plan a MiniMax H4 listing video. Review the actual packaging, visible labels, and generated audio; assess campaign results using your own measurements.

Prepare a short MiniMax H4 vertical video with one subject and one visible change. Choose the ratio, preview the complete clip, and revise the prompt before publishing.

Choose an available editing model in MiniMax H4 and describe the intended change. Check preserved details, lighting, and frame continuity against the original recording.

Build a MiniMax H4 shot study before a shoot. Describe framing and camera movement, review each draft, and keep the result as a planning aid rather than a guarantee of the final shot.
MiniMax H4 Pricing and Credit Plans
Cancel anytime
Lite
50% off0.025 / credit
Billed $ yearly179· Save $179.8
Video Models



Image Models



- Includes MiniMax H4 and all premium models
- Up to 1 batch generation task
- Standard generation speed
- Standard generation success rate
- Standard customer support
- Commercial Use License
Standard
50% off0.017 / credit
Billed $ yearly299· Save $299.8
Video Models
Image Models
- Includes MiniMax H4 and all premium models
- Up to 4 batch generation tasks
- Priority processing speed
- High generation success rate
- Priority customer support
- Commercial Use License
Pro
50% off0.014 / credit
Billed $ yearly599· Save $599.8
Video Models
Image Models
- Includes MiniMax H4 and all premium models
- Up to 10 batch generation tasks
- Fastest generation speed
- High generation success rate
- Dedicated account manager
- Commercial Use License
Max
50% off0.012 / credit
Billed $ yearly1,199· Save $1,199.8
Video Models
Image Models
- Includes MiniMax H4 and all premium models
- Up to 10 batch generation tasks
- Fastest generation speed
- High generation success rate
- Dedicated account manager
- Commercial Use License
Pay safely and securely with























FAQ
Frequently asked questions
Do I need a reference photo for MiniMax H4 text to image?
No. MiniMax H4 Text to image starts from a written subject, action, setting, and lighting direction. When a particular existing object must guide the result, use reference editing and upload a clear source image instead.
How detailed should a MiniMax H4 text to image prompt be?
Include the subject, position, action, framing, and light. A MiniMax H4 text to image prompt does not need every possible adjective. Start with a compact paragraph and add the missing instruction after reviewing the result.
Why does MiniMax H4 text to image add extra objects?
Check whether your wording names a collection without a clear count or asks for a busy environment. In MiniMax H4 text to image, specify the important quantities and simplify their arrangement. Explicit counts help you direct and review a result, but they do not guarantee that every count is followed.
Can I change the shape of the image?
Yes. Select another supported ratio for MiniMax H4 text to image and adjust the framing language accordingly. A wide environment and a vertical character portrait need different distributions of space even when they share the same subject.
Will repeating the same prompt give the same image?
Do not assume identical results. Keep the MiniMax H4 text to image prompt and configuration in your project notes so you can compare attempts, but expect variation. Save an image that establishes the direction; further reference editing may be more useful than repeatedly describing it from memory.
CTA
Start MiniMax H4 text to image with one clear scene
Choose a subject, explain its relationship to the objects around it, and name the light. Open MiniMax H4 text to image, check your settings, and make the first result a useful starting point for the next decision.
Describe your scene